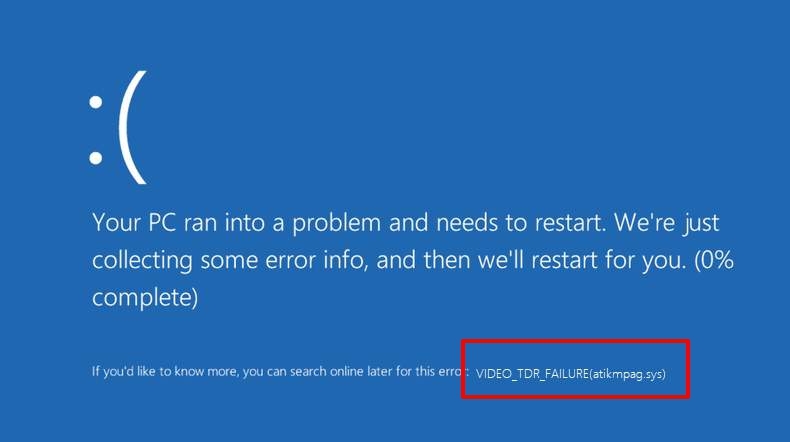
The ones that managed to catch the attention of the masses revolve mostly around the UI tweaks. But even in spite of all the goodies and new features that it has to offer, the OS isn’t free from its fair share of issues. In this regard, the BSOD (or the Blue Screen of Death) error seems to be the most concerning one for the end-users. And at the time of writing, a slew of complaints are all lined up regarding the Video TDR Failure BSOD issue.’
Why does VIDEO_TDR_FAILURE Occurs?
So what exactly is this TDR error all about? Well, when you carry out a graphics-intensive task, you might notice that the display might get hang or rather freeze for about a few seconds (especially on a low-end PC).
This usually happens because, during that time frame, the GPU is busy handling the resource allocation process and hence is unable to update the graphics on your screen. This is where the role of TDS or Timeout Detection & Recovery comes into the picture. It helps the OS in detecting that the display is currently non-responsive and hence lays down the fixes accordingly. However, when the TDS is itself non-responding, the graphics might stay in the frozen state for a considerable long time frame, and the OS in turn would display the BSOD error. Therefore, issues with the Timeout Detection & Recovery call for immediate attention and rectification. So in this guide, we will make you aware of various methods that shall help you fix the Video TDR Failure error in Windows 11. Follow along.
Best Ways to Fix Video TDR Failure Error in Windows 11
When it comes to rectifying the TDR issue, there’s no universal fix as such. You will have to try out each of the workarounds that we have shared below and then check which one gives out the best results. Moreover, some users weren’t able to access the OS while facing this error. If you are also on the same page, then consider booting your PC to the Safe Mode before executing the below fixes. So with that in mind, let’s get started.
Fix 1: Re-Enable Graphics Driver
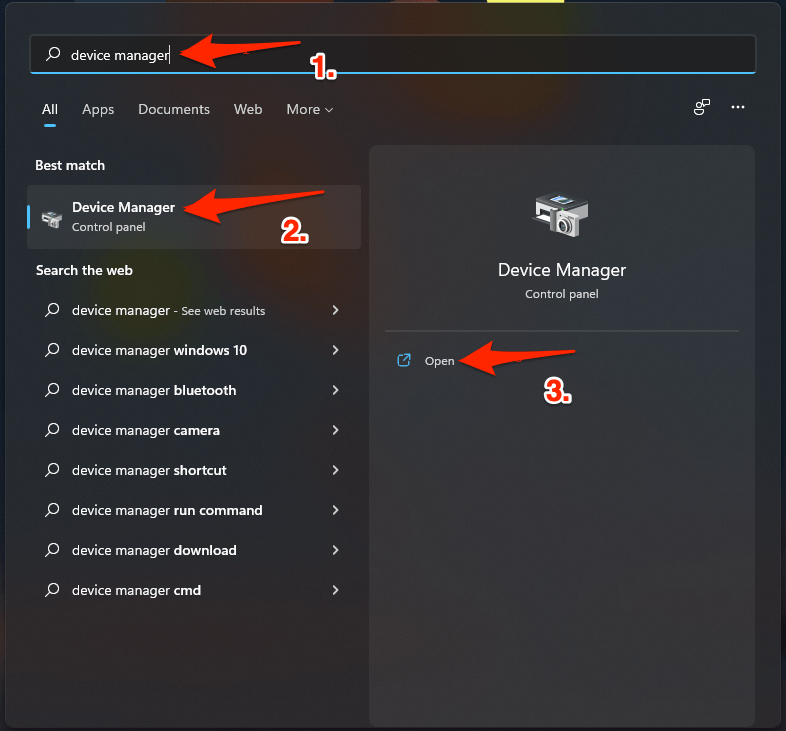
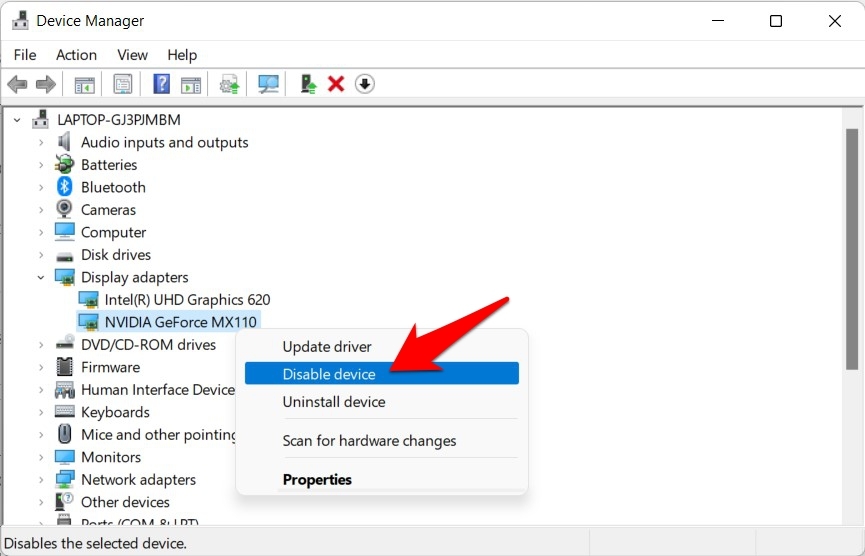
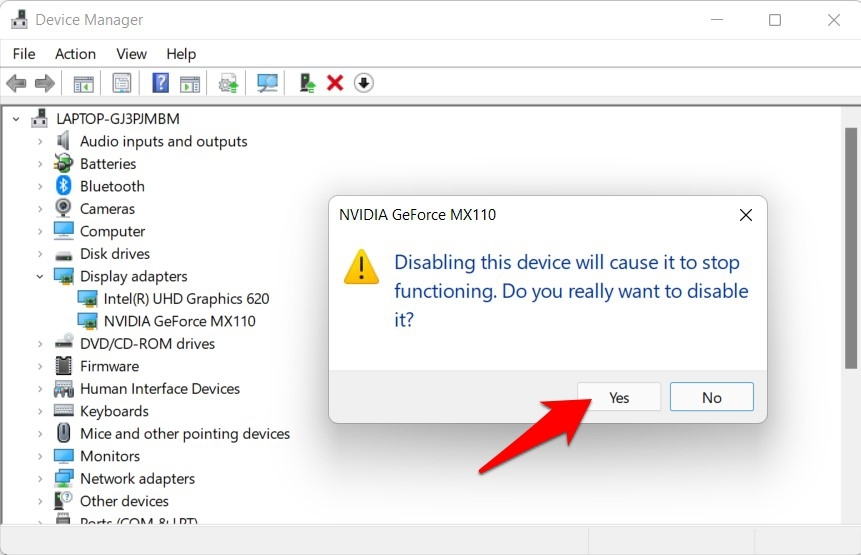
In some instances, restarting the graphics drivers is all that is needed to rectify the graphics-related issues. So proceed with the below steps to carry out this task: Once the driver has been re-enabled, verify whether if it is able to fix the Video TDR Failure error in Windows 11.
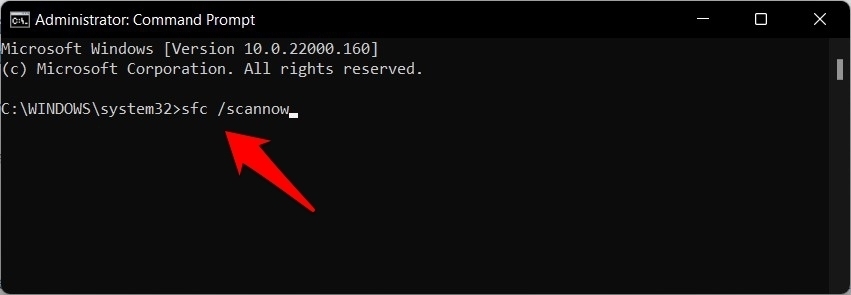
FIX 2: Use the SFC Command
The System File Checker command scans your PC for all the corrupt files and then replaces them with its working cached copy. So if any of the graphics-related configuration files have got corrupted, then this command could prove to be your best bet. Once the scanning is complete, which could take a few minutes, it is recommended to restart your PC. When it boots up, verify whether SFC was to fix the Video TDR Failure error in Windows 11.
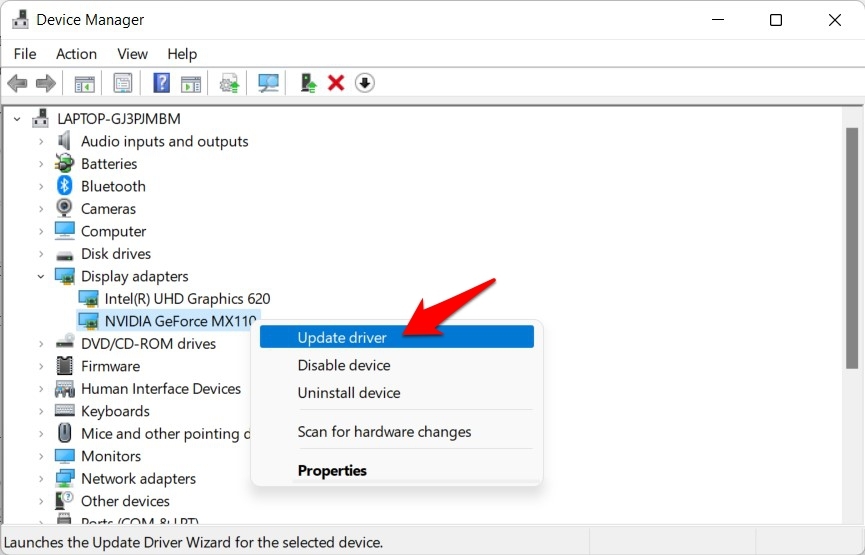
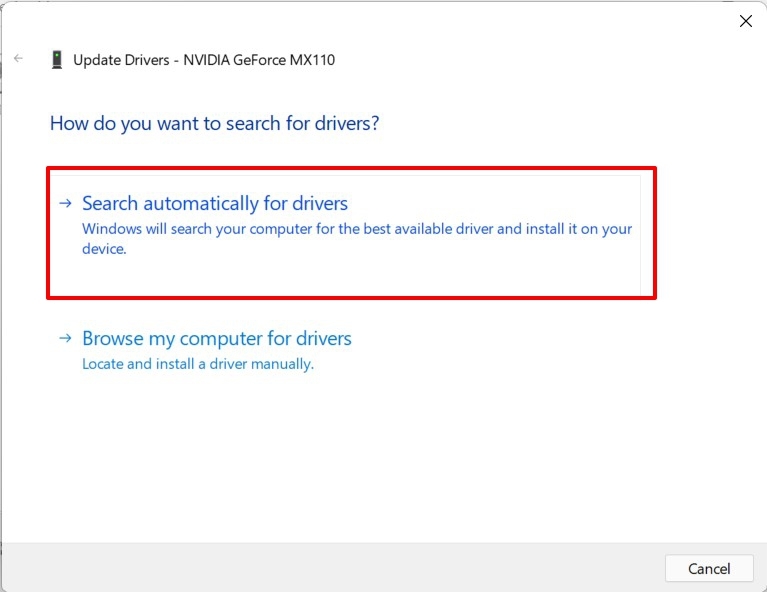
FIX 3: Update Graphics Card
If you are using an old or outdated graphics driver software, then it might not be able to handle most of the graphics-intensive tasks. Therefore, it is recommended to update these drivers to their latest builds, which could be done as follows: Once the installation is complete, check if the Video TDR Failure error in Windows 11 stands fixed or not.
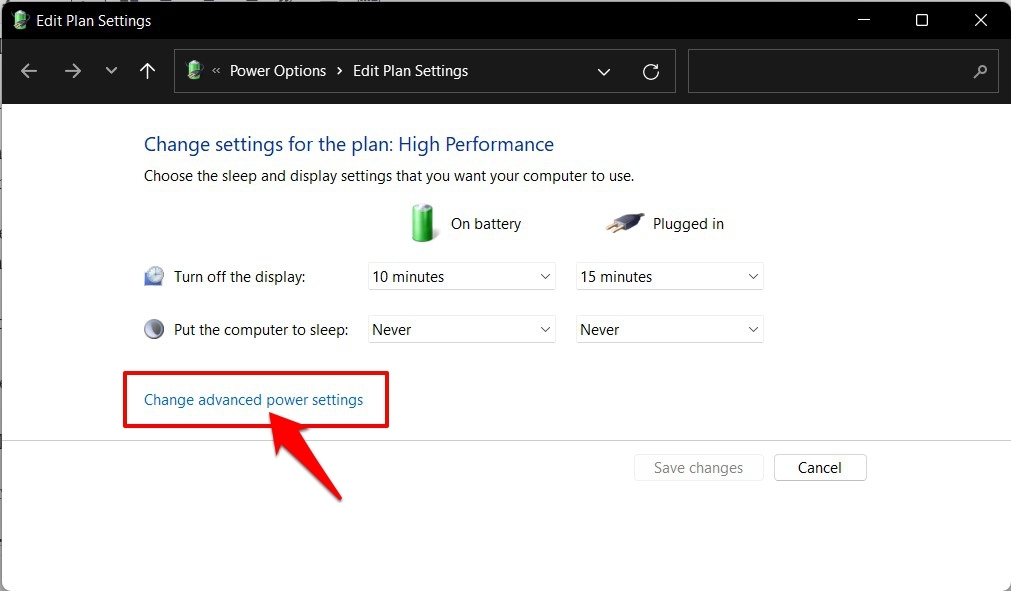
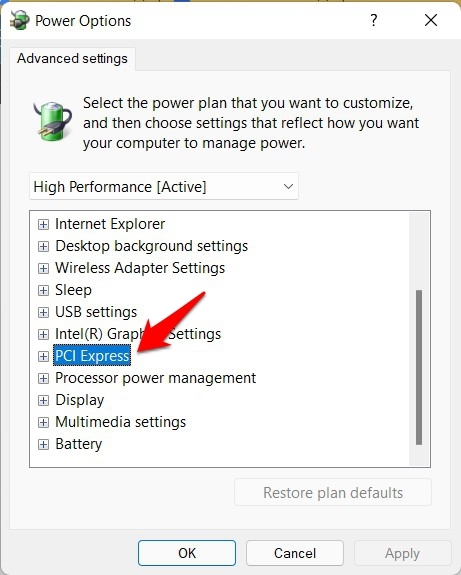
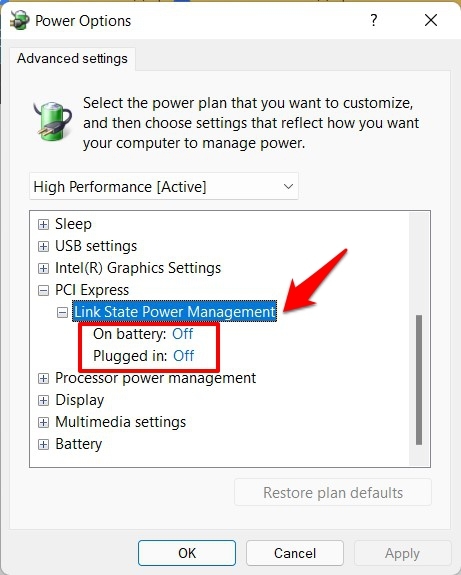
FIX 4: Change PCI Express Power Settings
Yor graphics cards and other peripheral devices are connected to your PC via the Peripheral Component Interconnect Express. Under normal circumstances, it might be able to function under restrictive power-saving modes. But while carrying out tasks that are rich in graphics consumption, it needs to be free from all the battery saver rules, which could be done as follows: Once that is done, verify if the Video TDR Failure Error in Windows 11 has been fixed or not.
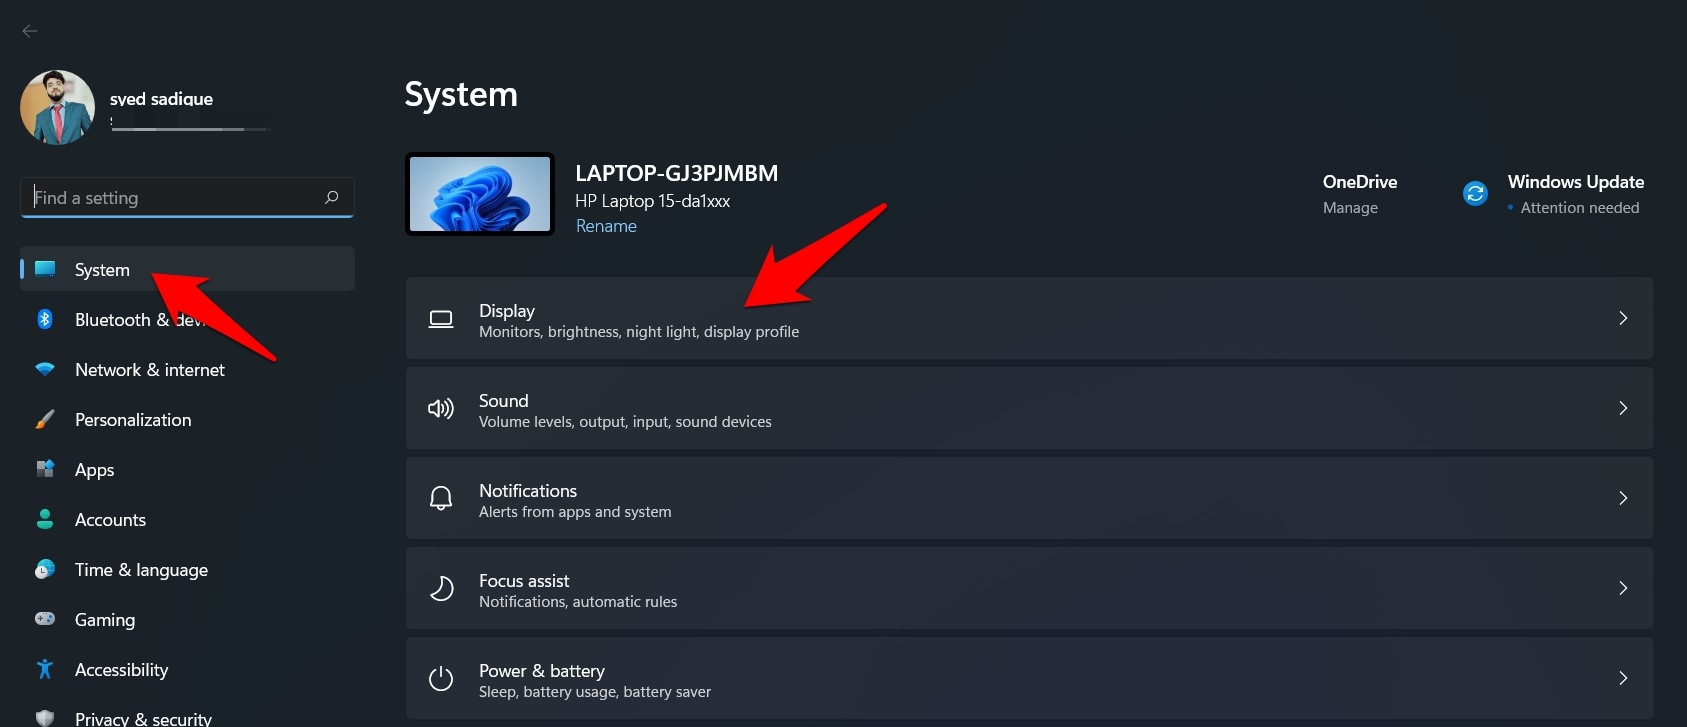
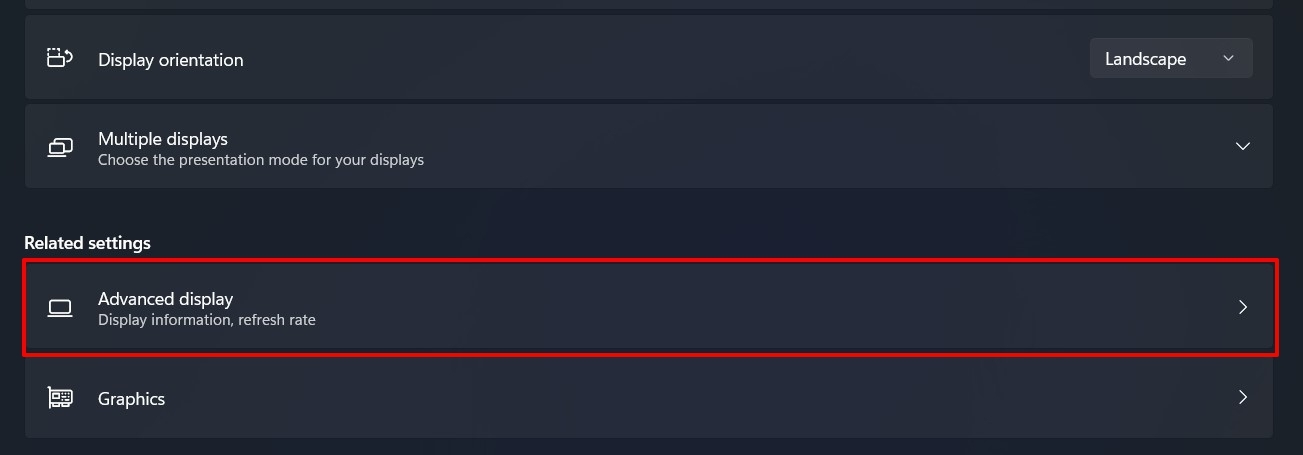
FIX 5: Change Refresh Rate to 120Hz
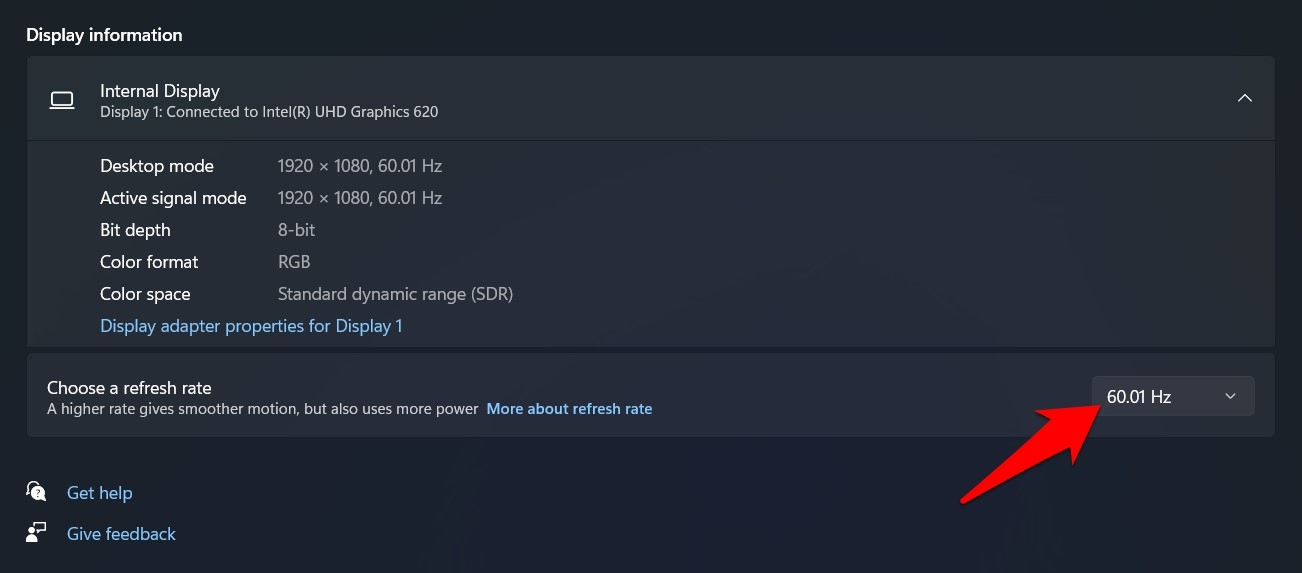
By default, the display refresh rate, aka the number of times the display refreshes itself per second, is set to 60Hz. However, when dealing with graphics-intensive processes, it’s better to increase this limit. While it could result in more battery drainage, but at the same time, it would also give you a much fluid user experience. So follow the below steps to increase the refresh rate on your Windows 11 PC: Now restart your PC for the changes to take place. Then check if switching over to a higher refresh rate is able to fix the Video TDR Failure Error in Windows 11.
FIX 6: Re-Install Graphics Card Drivers
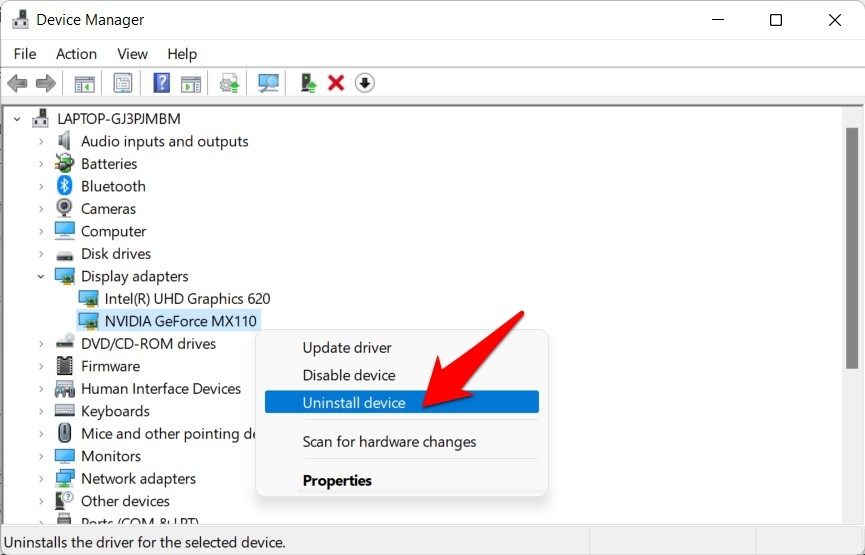
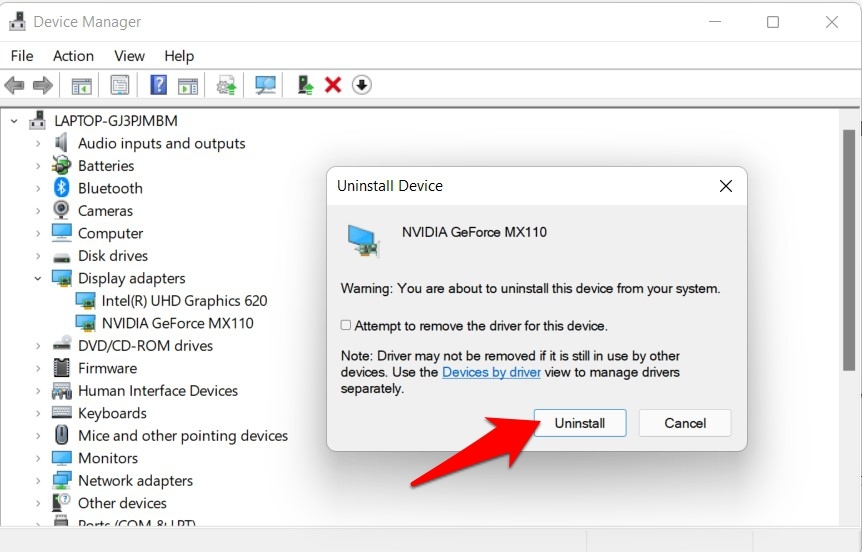
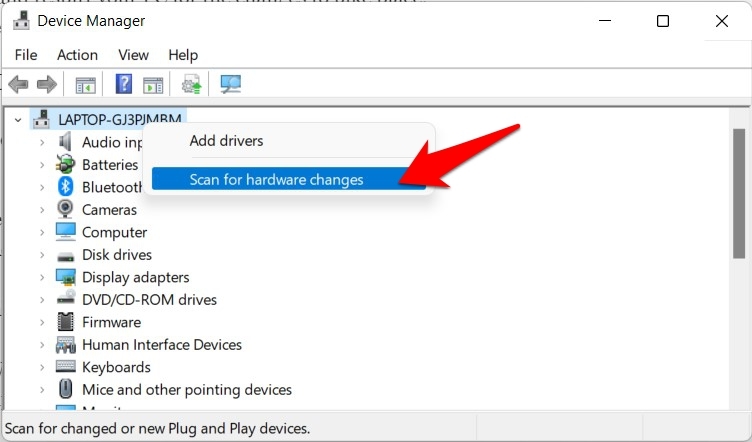
If none of the aforementioned methods spelled out success, then you should consider uninstalling and then re-installing the graphics drivers. Here’s how it could be done: So with this, we round off the guide on how you could fix the Video TDR Failure error in Windows 11. We have shared six different methods for the same. Do let us know in the comments section which one worked out in your favor. If you’ve any thoughts on VIDEO_TDR_FAILURE (atikmpag.sys) Error in Windows 11 [Solved], then feel free to drop in below comment box. Also, please subscribe to our DigitBin YouTube channel for videos tutorials. Cheers!
